Video window
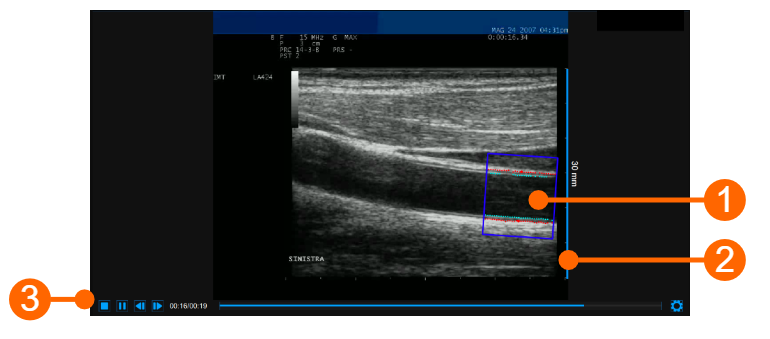
The video window shows the video signal from your ultrasound system. A ROI (1) can be traced in the video windows, where both the IMT and the diameter are computed.
The window also contains the calibration line (2) for the B-mode image once it has been calibrated. The video controls bar (3) is located at the bottom of the window. For more information on the video controls, see Video and image player.
ROI
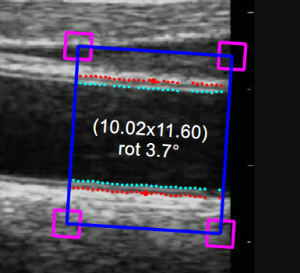
T he Region of Interest (ROI) is the portion of the image where both the diameter and the IMT are calculated. The points of the Lumen-Intima interface and the Media-Adventitia interface are displayed within the ROI in cyan and red color respectively. The ROI can be moved, resized, and/or rotated. Each time you change the position, size and/or inclination of the ROI, the analysis is re-initialized.
Draw a new ROI:
You can manually draw the diameter ROI with the desired size and position. If the image is already calibrated, you can also more quickly draw a diameter ROI with the default sizes set in Carotid Studio settings (a star in the Set ROI button will indicate that the default ROI can be drawn). The default ROI is also automatically rotated so to be parallel to the carotid artery.
default ROI drawing
Click on the Set ROI
 button in the Setup panel
(the button remains active)
button in the Setup panel
(the button remains active)Click in the video window in the center of the carotid artery.
A ROI of the default ROI sizes will be automatically initialized.
manual drawing
Click on the Set ROI
 button in the Setup panel
(the button remains active).
button in the Setup panel
(the button remains active).Click inside the video window and drag until the ROI is complete (the size of the ROI is shown in the Setup panel and graphically within the ROI).
When you release the mouse, the analysis is initialized.
Rotate the ROI:
Click on the upper side of the ROI and use the special cursor that indicates a rotation.
Hold inside the ROI, drag the rectangle by rotating it to the desired angle.
As an alternative, you can modify the position of the ROI by typing the value in the Setup panel.

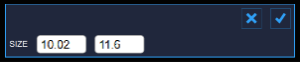
Resize the ROI:
Click on one of the sides or one of the corners of the ROI.
Drag to change the size of the the ROI.
A
n alternative, you can modify the size of the ROI by typing the value in the Setup panel.
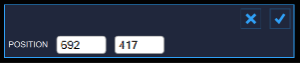
M ove the ROI:
Click and hold inside the ROI.
Drag the ROI to the location of interest.
A s an alternative, you can modify the position of the ROI by typing the value in the Setup panel.
Re-initialize the ROI:
Double click inside the Diameter ROI to re-initialize the position and the rotation of the ROI