Setup panel
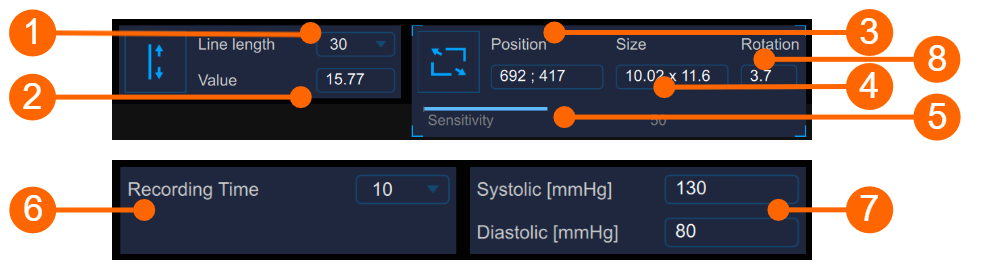
The setup panel must be used to set
the recording data length, to Calibrate the B-mode image, to set the ROI, the sensitivity of the algorithm and the systolic and diastolic blood pressures.
B-mode image setup
Calibration
The Set Calibration ![]() button is used to Calibrate the B-mode image.
button is used to Calibrate the B-mode image.
The drop-down menu (1) shows the length of the line used for the calibration.
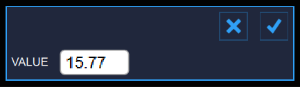
The numeric display (2) shows the calibration value.
I f you click in the value field, you are allowed to manually enter the calibration value in the editable field (if you already know the value). The click the Save button to enter the values.
ROI
The Set ROI ![]() button is used to set the ROI.
button is used to set the ROI.
The numeric display (3) shows the center position, in pixels, of the ROI.
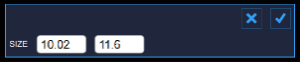
The numeric display (4) shows the size (width x height), in pixels, of the ROI.
I f you click in the value field, you are allowed to manually enter the ROI position and size values in the editable fields (if you already know the values). The click the Save button to enter the values.

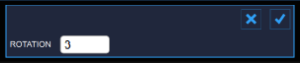
The numeric displays (8) show the degree of rotation of the ROI.
I f you click in the value field, you are allowed to manually enter the degree value of rotation.
Sensitivity
The slider (5) sets the sensitivity of the algorithm. Adjust this value in order to have a better detection of the intima-media border and the media-adventitia border.
Recording Data Length
The drop-down menu (6) shows the time length of the diameter and IMT data recording.
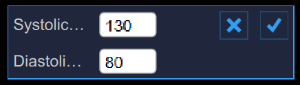
Blood Pressure
The numeric displays (7) show the values of systolic and diastolic blood pressure. If you click in the value field, you are allowed to manually enter the values of systolic and diastolic blood pressure. The click the Save button to enter the values.
If present, these values will be used to compute the stiffness parameters. For this purpose, the local carotid pressure should be used: in this case the carotid waveform is obtained by tonometer or similar device and it is generally calibrated by brachial measurement (sphygmomanometer) assuming that mean and diastolic values are constant along the arterial tree. For more information you can see:
"Reference values for local arterial stiffness. Part A: Carotid artery", Engelen L, Bossuyt J, Ferreira I et al., J Hypertens. 2015 Oct;33(10):1981-96
"Expert consensus document on arterial stiffness: methodological issues and clinical applications.", S. Laurent, J. Cockcroft, L. Van Bortel et al., Eur Heart J. 2006 Nov;27(21):2588-605
Once you have calibrated the B-Mode image and set the ROI, click on the Next ![]() button to proceed to set the recording the data length and the blood pressure. Alternatively, you can click on the Start study
button to proceed to set the recording the data length and the blood pressure. Alternatively, you can click on the Start study ![]() button to start the analysis.
button to start the analysis.