Video window

The video window shows the video signal from your ultrasound system. Two ROIs can be present in the window: the diameter ROI in blue (1) and the Doppler flow ROI in green (2).
The window contains also the calibration lines for the B-mode image (3) and for the Doppler flow (4)(5), once these have been calibrated.
The video controls bar (6) is located at the bottom of the window. For more information on the video controls, see Video and image player.
Diameter ROI
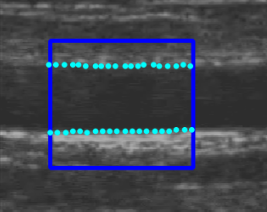
The Diameter Region of Interest (ROI) is the portion of the image where the diameter is calculated. The edges of the vessel obtained by the algorithm of edge detection are displayed within the ROI. The ROI can be moved and/or resized. Each time you change the position and/or size of the ROI, the contours of the vessel are re-initialized.
Draw a new diameter ROI:
You can manually draw the diameter ROI with the desired size and position. If the image is already calibrated, you can also more quickly draw a diameter ROI with the default sizes set in FMD Studio settings (a star in the Set ROI button will indicate that the default ROI can be drawn).
default ROI drawing
Click on the Set ROI

button in the Setup panel (the button remains active).
Click in the video window in the center of the brachial artery.
A ROI of the default ROI sizes will be automatically initialized.
manual drawing
Click on the Set B-Mode ROI
 button in the Setup panel (the button remains active).
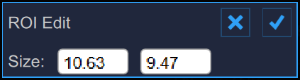
Click inside the video window and drag until the Diameter ROI is complete (the size of the ROI is shown in the Setup panel).
When you release the mouse, the contours are initialized.
Modify the diameter ROI:
Click on one of the sides or one of the corners of the diameter ROI.
Drag to change the size of the the diameter ROI.
As an alternative, you can modify the size of the diameter ROI by typing the value in the Setup panel.
Move the diameter ROI:
Click and hold inside the diameter ROI.
Drag the diameter ROI to the location of interest.
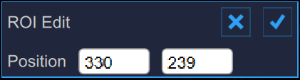
As an alternative, you can modify the position of the diameter ROI by typing the value in the Setup panel.
Re-initialize the edge detection algorithm:
Click inside the Diameter ROI.
Doppler flow ROI
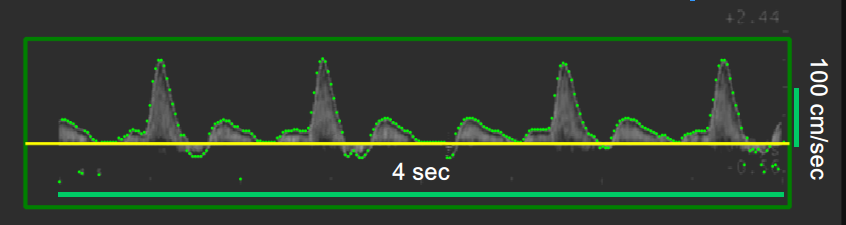
The Doppler Flow Region of Interest (ROI) is the portion of the image that includes the Doppler Flow waveform.
The algorithm for the Doppler Flow analysis, automatically locates the zero line, which is displayed in yellow, and the wav eform, which is displayed in green.
The Doppler Flow ROI can be moved and resized. Each time you chang e the position and size of the ROI, the algorithm is re-initialized and the zero line is re-localized.
For more information on ultrasound setting for Doppler analysis, please see how to Calibrate the Doppler flow image.
Draw a new Doppler flow ROI:
Click on the Set Doppler Flow ROI
button in the Setup panel (the button remains active).
Click inside the video window and drag until the Doppler Flow ROI is complete (the size of ROI is shown in the Setup panel).
When you release the mouse, the algorithm for the Doppler Flow analysis is initialized.
Modify the Doppler flow ROI:
Click on one of the corners of the Doppler Flow ROI.
Drag to change the size of the the Doppler Flow ROI (the size of ROI is shown in the Setup panel).
As an alternative, you can modify the size of the Doppler flow ROI by typing the value in the Setup panel.
Move the Doppler Flow ROI:
Click and hold inside the Diameter ROI.
Drag the Doppler Flow ROI to the location of interest.
As an alternative, you can modify the position of the Doppler flow ROI by typing the value in the Setup panel.
Re-initialize the algorithm for the Doppler Flow analysis:
Click inside the Doppler Flow ROI.
Re-initialize the ROI:
Double click inside the Diameter ROI to re-initialize the position of the ROI