Create a new study
When you start Carotid Studio, a procedure guides you in the creation of a new study. The steps are:
Select the study modality
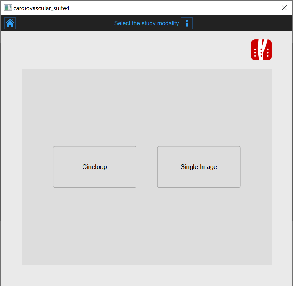
In this tab, you can select the study modality. Carotid Studio allows to analyze through "Cineloop" modality (loading a video clip) and "Single Image" modality (processing a single frame coming from a video or loaded as image).
Select the source
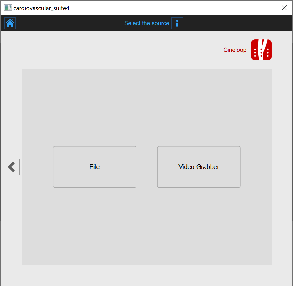
In this tab, you can select the study video source. With the "Cineloop" modality, Carotid Studio processes video sources (Video File or a DICOM File) while with "Single Image" it also processes images. Both the modalities allow to work in real-time by processing images directly coming from the ultrasound equipment thanks to a video converter.
Select the patient
For DICOM files, the patient data are obtained by the file metadata and this window is skipped (see Settings). You can anyhow edit the patient data from the Review window.
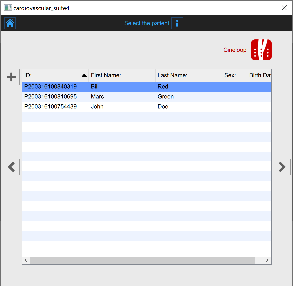
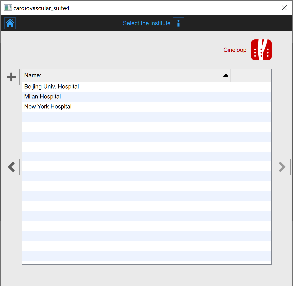
In this tab, you can select the patient among the ones already present in the Archive. Select the patient and click on the Next ![]() button (you can simply double-click on the patient to proceed). If you want to create a new patient, click of the Add New Patient
button (you can simply double-click on the patient to proceed). If you want to create a new patient, click of the Add New Patient ![]() button.
button.
In the Add new patient frame, enter the patient data. The only mandatory field is the patient ID (a random value is automatically proposed). Click on the Save button ![]() to save the patient data.
to save the patient data.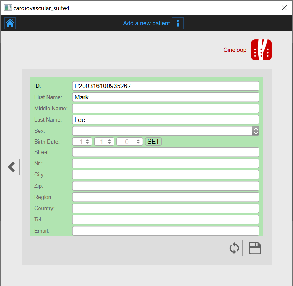
Select the institute
If it is the first time you create a study, after selecting the patient you will also need to select the institute. If you have already created at least one study, the software remembers the institute used for the previous study and after selecting the patient shows you automatically the final review (where you can still make changes before starting the new study).
In this tab, you can select the institute among the ones already present in the Archive. Select the institute and click on the Next ![]() button (you can simply double-click on the institute to proceed).
button (you can simply double-click on the institute to proceed).
If you want to create a new institute, click of the Add New Institute ![]() button.
button.
In the Add new institute frame, enter the institute data. The mandatory field (Name) is in red until you have filled in the Name blank. Click on the Save ![]() button to save the institute data.
button to save the institute data.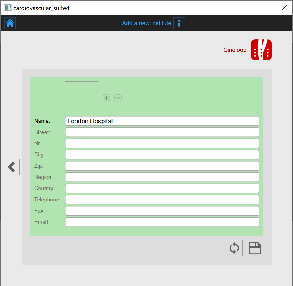
Review
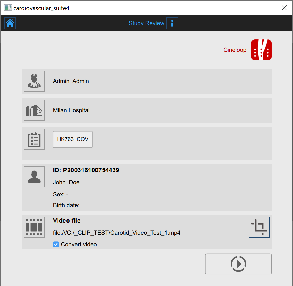
In this tab you can review your selection (you can also change Patient ![]() and Institute
and Institute ![]() by clicking on their buttons). It is possible also to change the selected source for this study by clicking on the icon that represents the source.
by clicking on their buttons). It is possible also to change the selected source for this study by clicking on the icon that represents the source.
Here, the user has the possibility to associate the study to one or more existing protocols, by clicking on the protocols icon ![]() .
.
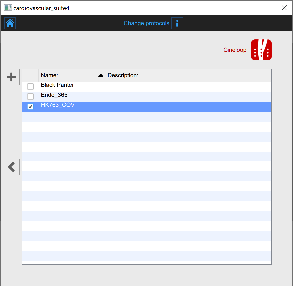
In the Protocols tab, you can associate the study to one or more than one protocols already present in the Archive. Put a tick on the protocol you want to associate the study with. If you want to create a new protocol, click of the Add New protocol ![]() button. In the Add new protocol frame, enter the protocol data. The mandatory field (Name) is in red until you have filled in the Name blank. Click on the Save
button. In the Add new protocol frame, enter the protocol data. The mandatory field (Name) is in red until you have filled in the Name blank. Click on the Save
![]() button to save the protocol data.
button to save the protocol data.
Click on the Previous
![]() button to go back to the review window.
button to go back to the review window.
If in the Settings manager the option "Remember last used protocols" is checked, the study will be associated by default with the last used protocols.
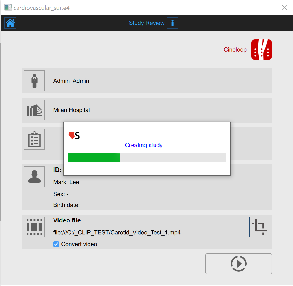
In addition, if you have chosen a video file as source, in the review window, it is possible to convert the video file to be optimized for the analysis with Carotid Studio. This operation may take few minutes.
The default value of the "Convert video" checkbox is set by the "Convert video by default" option in the Settings manager.
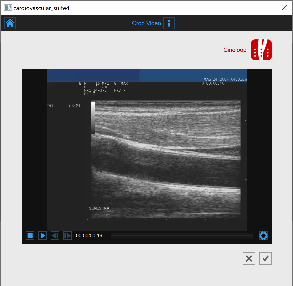
You can also crop the images by clicking the Crop
![]() button in the source panel. In this case, a new window opens; it is possible to select a region to be used for the analysis. Click on the Confirm
button in the source panel. In this case, a new window opens; it is possible to select a region to be used for the analysis. Click on the Confirm ![]() button after you have drawn the region.
button after you have drawn the region.
Click on the Start the Study ![]() button to proceed. A progress bar, as shown in the following picture, will show you the progression of the study creation.
button to proceed. A progress bar, as shown in the following picture, will show you the progression of the study creation.